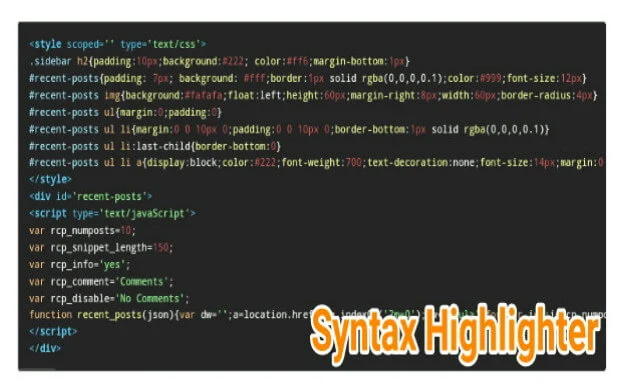
I think most of you who visited this post already know what Syntax highlighter is and are looking for ways to make one. The use of this feature is indeed common on sites or blogs that discuss a lot about blogging tutorials for putting codes in their posts. The name of this feature is really cool, so it's not surprising that some of us might just know that it's called Syntax highlighter.
Maybe you are wondering why my blog doesn't use this feature even though this blog also sometimes discusses blogging tutorials that contain html codes? Yes, I really have no interest in installing it so I still use the manual method or use the blockquote feature to place these codes. Even so, I'm interested in learning how to install this Syntax highlighter and want to share a tutorial on how to install it in this article.
Syntax Highlighter is a special feature that functions to place certain programming codes so that it is easier for visitors to read or learn them. With this feature, visitors will find it easier when they want to copy codes such as CSS, HTML or Javascript because the appearance is indeed different from the usual text in posts. Usually this feature also makes the code colorful so it looks more attractive.
There are many ways on how to make this syntax highlighter feature. One of them is like the tutorial below. If you want to follow this tutorial, it will look like the following screenshot:
How to make?. The installation method is quite easy. Please follow the steps below.
1. Open your blogger account.
2. Select the theme menu and click edit html.
3. In order for this feature to work properly, make sure your template has the jquery code installed. If it's not there, please copy the code below and place it above the </head> code
<script src='https://ajax.googleapis.com/ajax/libs/jquery/1.7.1/jquery.min.js'/>
4. Next, copy the code below and place it above the </head> code
<style type='text/css'>/* Highlighter */pre{white-space:pre;word-wrap:normal;overflow:auto;font-size:14px;margin:0;padding:0}hr{margin-top:2rem;background:#ccc;height:1px;border:0;margin-bottom:2rem}.post-body code{padding:1.2em}.post-body pre{padding:0;border-radius:3px;background-color:#292e34;word-spacing:normal;word-break:normal;line-height:1.4em}.post-body .hljs{display:block;overflow-x:auto;padding:1.2em;background:#2b2b2c;color:#fff;line-height:1.5;text-align:left;word-spacing:0;font-family:monospace;border-radius:3px}.post-body .hljs-name,.post-body .hljs-strong{font-weight:bold}.post-body .hljs-code,.post-body .hljs-emphasis{font-style:italic}.post-body .hljs-tag{color:#62c8f3}.post-body .hljs-variable,.post-body .hljs-template-variable,.post-body .hljs-selector-id,.post-body .hljs-selector-class{color:#ade5fc}.post-body .hljs-string,.post-body .hljs-bullet{color:#a2fca2}.post-body .hljs-type,.post-body .hljs-title,.post-body .hljs-section,.post-body .hljs-attribute,.post-body .hljs-quote,.post-body .hljs-built_in,.post-body .hljs-builtin-name{color:#ffa}.post-body .hljs-number,.post-body .hljs-symbol,.post-body .hljs-bullet{color:#d36363}.post-body .hljs-keyword,.post-body .hljs-selector-tag,.post-body .hljs-literal{color:#fcc28c}.post-body .hljs-comment,.post-body .hljs-deletion,.post-body .hljs-code{color:#888}.post-body .hljs-regexp,.post-body .hljs-link{color:#c6b4f0}.post-body .hljs-meta{color:#fc9b9b}.post-body .hljs-deletion{background-color:#fc9b9b;color:#333}.post-body .hljs-addition{background-color:#a2fca2;color:#333}.post-body .hljs a{color:inherit}.post-body .hljs a:focus,.post-body .hljs a:hover{color:inherit;text-decoration:underline}mark .post-body .hljs-attr,mark .post-body .hljs-string,mark .post-body .hljs-bullet{background-color:#e67e22;color:#fff}.post-body .hljs mark{background-color:#f24a4a;color:#fff;padding:2px 5px;border-radius:2px}.post-body .hljs mark span.hljs-number,.post-body .hljs mark span.hljs-comment,.post-body .hljs mark span.hljs-symbol,.post-body .hljs mark span.hljs-string,.post-body .hljs mark span.hljs-attr,.post-body .hljs mark span.hljs-keyword,.post-body .hljs mark span.hljs-name,.post-body .hljs mark span.hljs-tag{color:#fff;margin:.15rem 0}</style>
5. Finally, copy the following code and place it above the </body> code
<script type='text/javascript'>//<![CDATA[// Highlighter$('i[rel="pre"]').replaceWith(function(){return $("<pre><code>"+$(this).html()+"</code></pre>")});for(var pres=document.querySelectorAll("pre,code,kbd,blockquote,td"),i=0;i<pres.length;i++)pres[i].addEventListener("dblclick",function(){var e=getSelection(),t=document.createRange();t.selectNodeContents(this),e.removeAllRanges(),e.addRange(t)},!1);function downloadJSAtOnload(){var e=document.createElement("script");e.src="https://cdn.rawgit.com/Arlina-Design/frame/6c8ec00f/highlightr.js",document.body.appendChild(e)}window.addEventListener?window.addEventListener("load",downloadJSAtOnload,!1):window.attachEvent?window.attachEvent("onload",downloadJSAtOnload):window.onload=downloadJSAtOnload;//]]></script>
6. Save your template again.
How to Write Syntax Highlighter in Posts
When you want to use this feature for your post, please enter edit post and open it using html mode. Then use the following format for how to write it:
<pre> <code> __TAMBAHKAN KODE CSS/HTML/JAVASCRIPT DI SINI__ </code></pre>
Please replace the sentences marked in red above with the Css, Html, or Javascript code that you want to add. Don't forget to parse the codes first before adding them. For example, you can use the Blogcrowds site to parse it.
After the post is complete and the code has been added to the Syntax Highlighter, please publish the post and you can see the results.
Cool isn't it?. Thus the tutorial on how to install the Syntax highlighter for placing code on Blog posts. Hope it is useful.
READ MORE


